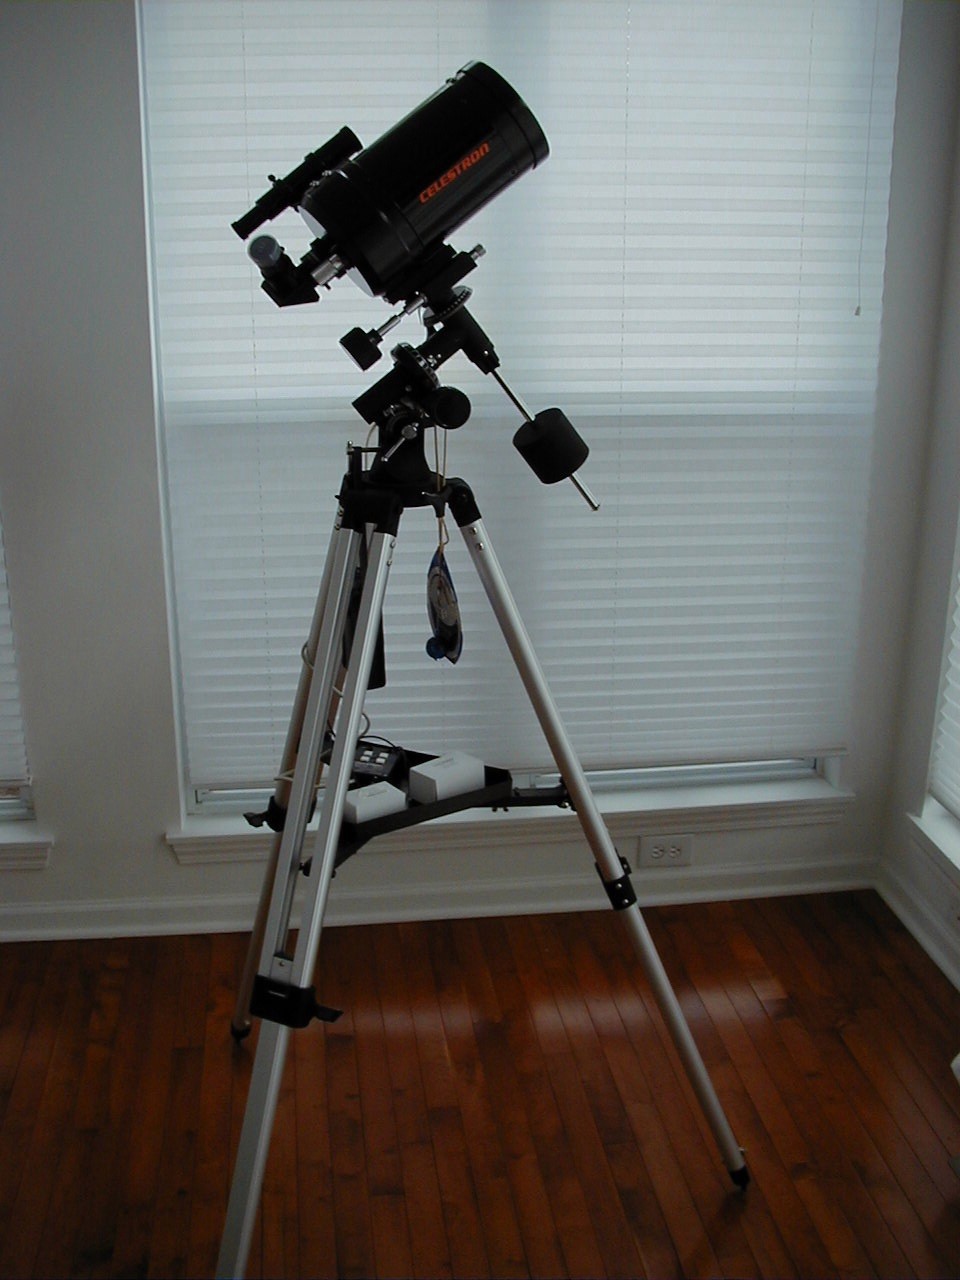
Here is my telescope - the Celestron G5
My telescope is of the Schmidt-Cassegrain design. Here are some additional photos that show how it works.
| Jerry's Astronomy Web Page |
Welcome to my web page on astronomy! Here I hope to share some of my observations and favorite sky objects. Over time I hope to add some pictures of items I have photographed with my own Celestron G5 telescope. If you too are interested in amateur astronomy, feel free to write to me and share your experiences in this exciting hobby. If you send me pictures, I'll try to post them on this web page for all to see. I'd prefer to collect pictures that other amateurs have actually taken themselves with their own telescopes.
Here is a photograph of my telescope - the Celestron G5. It is
a 5" SCT (Schmidt-Cassegrain Telescope). The large weight at the
bottom of the rod under the telescope is there to balance the telescope
so that as it rotates around the polar axis, the weight of the telescope
is counter-balanced. This creates less work for the motor drive and
prevents the telescope from moving away from the object you are viewing
if you loosen the lock knob on the right ascension control.
Here is my telescope - the Celestron G5
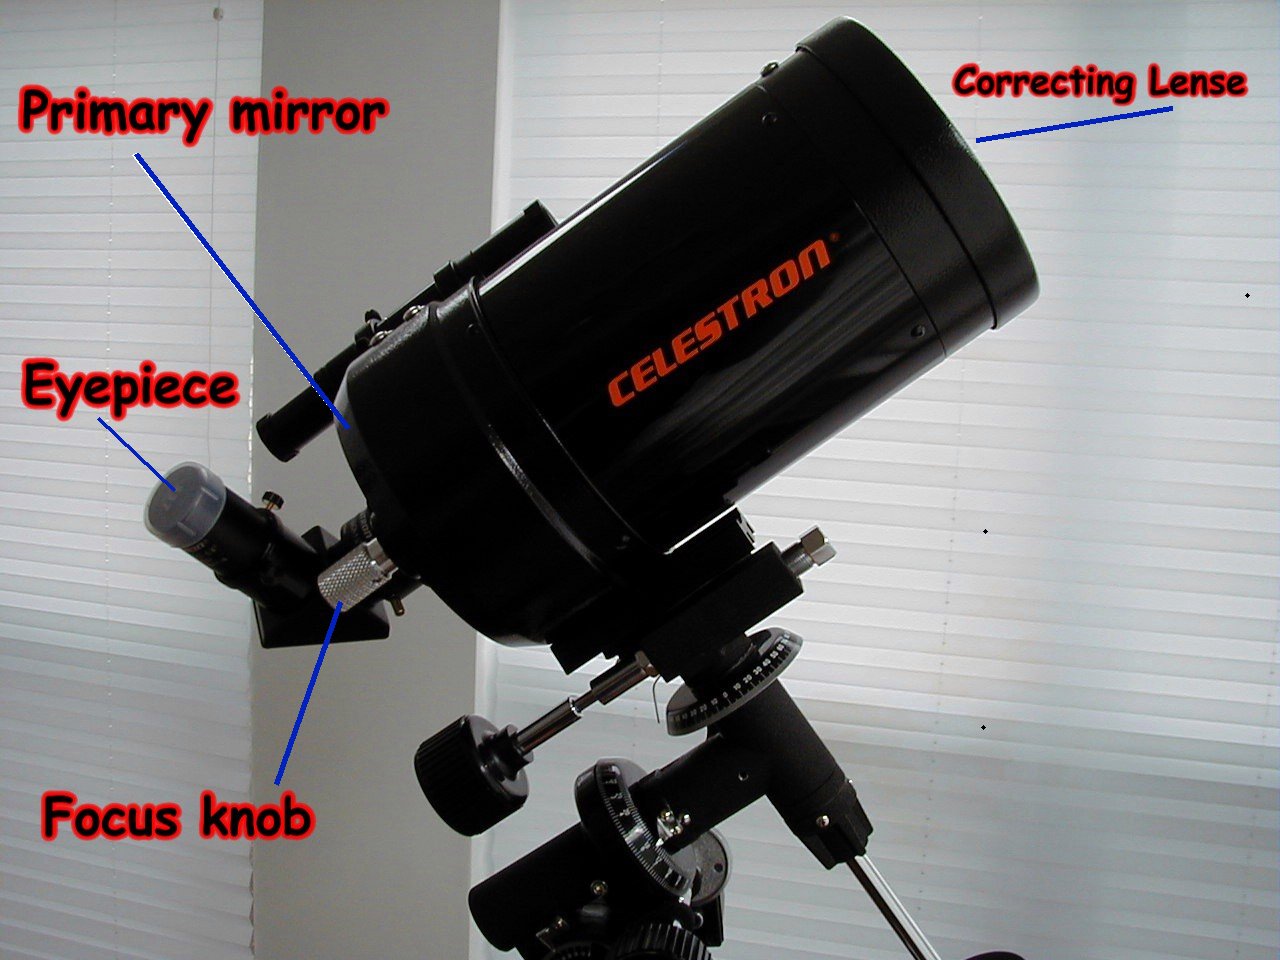
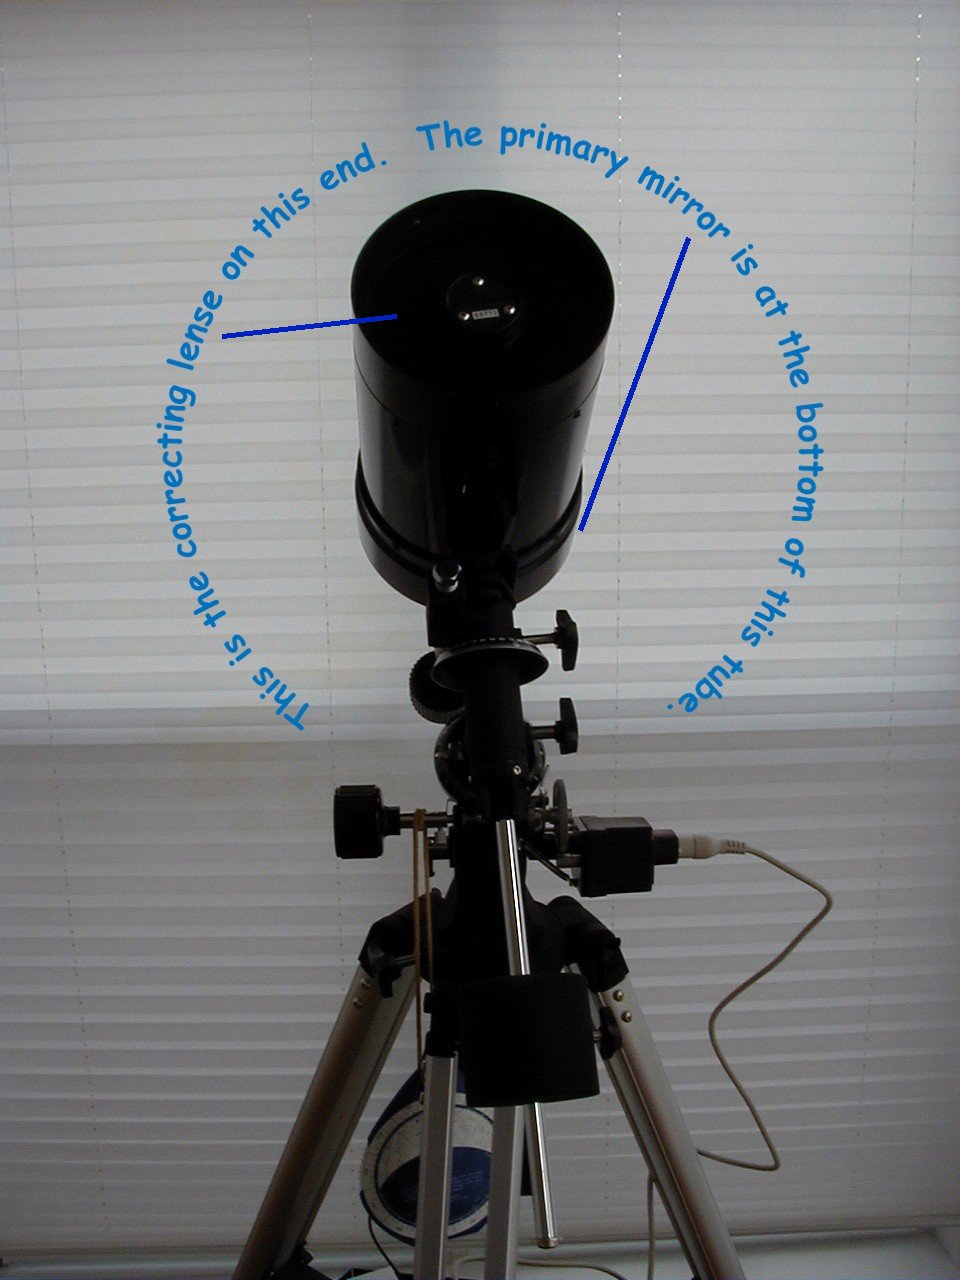
My telescope is of the Schmidt-Cassegrain design. Here are some additional photos that show how it works.
In the Schmidt-Cassegrain design used by Celestron, light entering the correcting lense is focused upon the mirror at the back of the tube. The light is then reflected by the mirror back up the tube to a smaller mirror mounted right in the middle of the correcting lense at the top of the telescope. From there it is bounced back down the tube to the eyepiece (via the diagonal mirror shown in this picture). The diagonal mirror simply makes it more comfortable to stand beside the telescope and do your viewing rather than trying to look "up" the scope. For objects high above, it is almost essential to prevent neck strain!
This telescope uses an equatorial mount on the tripod to move it in
two directions; right ascension and declination. You can think of
right ascension as being the celestial equivalent of earthly longitude
while declination is the celestial equivalent of latitude. The difference
is that one set of coordinates are projected onto the earth and the other
is projected onto the stars.
The motor drive automatically moves the telescope in synchronization
with the objects overhead so that once you have selected an object to watch
and activated the motor drive, you don't have to fiddle with the adjustments.
You just let the motor drive track it from then on. Of course, this
requires some alignment of the tripod to "celestial north" prior to use
of the motor drive. That means the right ascension axis of the telescope
is adjusted until it is pointing directly at the North Star (Polaris).
Once this alignment has been completed, the telescope clock drive will
rotate the telescope around the right ascension axis such that it keeps
the object under study in the center of the eyepiece. This is especially
helpful for high power observing and photography.

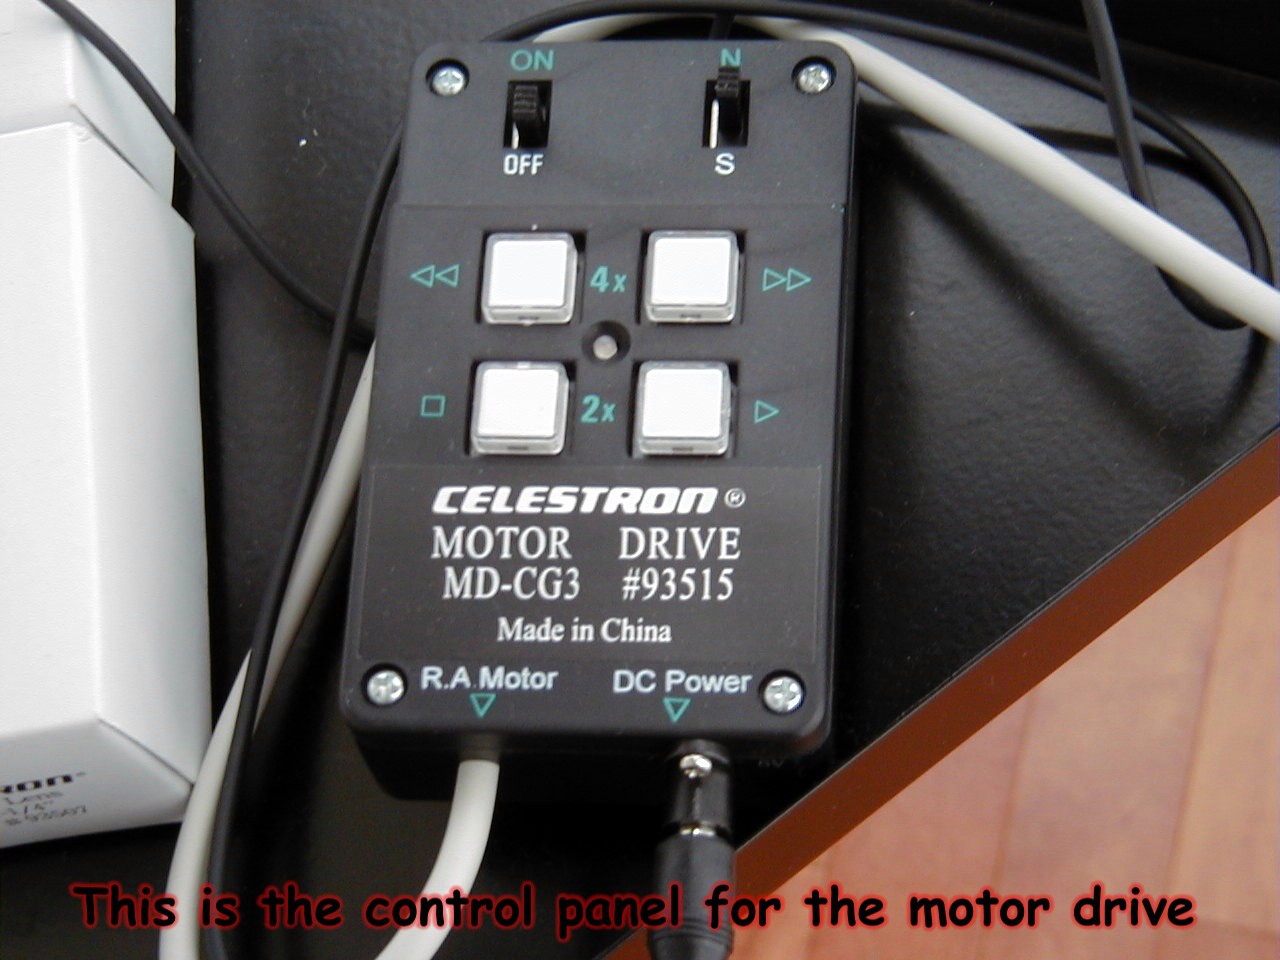
This is the motor drive control box. It allows you to stop the
motor drive, reverse it, and fast forward it. One nice thing about
Celestron's implementation of the motor drive is that it runs on batteries!
In the old days the clock drive only ran on 110 VAC so you had to take
a DC-to-AC inverter into the field with you and a long extension cord so
you could run your clock drive off of your vehicle!
A Telescope Story
Years ago, I ventured into astronomy with the purchase of an Edmund Scientific telescope. It was a 4&1/2" reflector mounted on a true equatorial mount with clock drive. I used this scope for many years and enjoyed some excellent viewing. I had purchased several eyepieces for it and a Barlow (doubler). However, right after I got married, I had too many hobbies and a new kid! So, I sold my telescope to a fellow for $300. It was in very good condition and looked like new and so he grabbed it up quickly.
Imagine my shock when I was rumaging through some old receipts and found the original Edmunds receipt which revealed I had only paid $149 for the telescope new! I had sold it some 8 years later at double my original cost! I felt so bad about "taking" the fellow who bought my telescope but I didn't know how to contact him again. Shortly thereafter, I happened across an Edumund Scientific catalog and discovered my little reflector telescope was selling for $429! So, now I understood why the fellow was so anxious to snatch up my telescope so quickly!
A good telescope is a good investment in the educational value and excitement
that it can bring to your children, friends and neighbors. It is also (apparently)
just simply a good investment. My understanding is that those lucky amateurs
who purchased quality telescopes from a few years ago have seen their investment
appreciate.
Some Things to Consider in Purchasing a Telescope
There are many things to consider when giving thought to the purchase of a telescope. Here are some of my thoughts on this matter.
First of all, astronomy is a fantastic hobby! It can provide years of enjoyable viewing and exploration of the cosmos. Many people have enjoyed considerable star gazing, planet watching and moon observering with nothing more than a good pair of binoculars. So, in a word, it doesn't have to be an expensive hobby. However, if you are going to purchase a telescope, please give due consideration to investing in a quality instrument. Also, most amateurs who would seek to advise you properly would tell you the following: "purchase a telescope that you will use on a regular basis". That may sound like simplistic advice but in fact it is very good advice. There are many things to consider in purchasing a telescope but two important considerations are weight and the location where you will be carrying out your observing.
WEIGHT
------------
Sure, if we all had ideal viewing locations (read that
- "dark skies"), we would probably like to have the Mount Palomar 200"
reflector in our backyards so we could observe even the smallest and faintest
of celestrial objects. However, it is very hard to lug the Mount
Palomar telescope around! Of course I am just kidding but the point
here is that a really large and heavy telescope may limit your desire to
haul the instrument out into the dark skies of the country (if you live
in the city like me) and so you may find that you don't use your telescope
as frequently as you would have used a smaller and lighter instrument.
Therefore, consider the size and weight of the instrument and how that
will affect your desire to transport the telescope to a remote site (or
even your backyard) and set it up for a night's viewing. Unless you
are fortunate to live in a dark sky area, you will more than likely need
to transport your telescope to darker skies from time to time for the best
viewing conditions.
APERTURE
------------------
If like me you live near a fairly large city, you may
find that your skies are (unfortunately) rather light polluted. Many
cities are working to control this waste of energy (street lights and other
light sources that illuminate the heavens instead of the ground) but there
can be considerable reflected light in the night sky near even a medium
size city. So, when purchasing a telescope, consider how much light
polution you will be dealing with when you observe. The diameter
of the main objective or aperture of the telescope has a direct impact
upon the resolving power of the telescope and the amount of light that
it can gather for distant and faint objects. If you live in a light
fogged area, the larger the diameter of the telescope, the more the amount
of light fog that will be captured in the image as well. Thus, in
highly light polluted areas, you may find that a five inch telescope provides
crisper and shaper views of the heavens than a ten inch telescope.
Thus, the image seen through the larger telescope may be fuzzier than the
same image seen through a smaller telescope from the same location due
to the light pollution. However, the ten inch telescope will continue
to maintain a lead in terms of its resolving power and image size within
the viewfinder. For my backyard with considerable light pollution
in the skies above, my five inch telescope does a very good job despite
the less than perfect viewing conditions. For observers blessed with
a dark sky observing location, a large telescope can provide fantastic
large and bright images!
RESOLVING POWER
-----------------------------
Sometimes referred to as "Dawes Limit", the resolving
power of a telescope defines the instrument's ability to visually separate
two very closely positioned objects at a great distance away. Thus,
a double star (two stars that are so close together that they look like
a single star to the naked eye) may or may not be separated into two distinct
stars through the eyepiece of the telescope dependent upon the resolving
power of the telescope and how close the objects are to one another.
You can calculate the resolving power of a telescope by dividing the diameter
of the aperture of the telescope (in inches) into the constant 4.56.
Thus an eight inch scope has a resolving power of .6. This resolving
power affects whether or not you can visually separate some double and
triple stars, tight star clusters and even the division in Saturn's rings
(the Cassini Division the largest gap in the rings separate ring B and
ring A). Of course it is also affected by the visual acuity of the
observer and the observing conditions for your location.
QUALITY
--------------
Quality almost always speaks for itself in any item but
particularly in regard to optical systems. Poorly aligned optics or poor
quality optics will result in fuzzy images as well as the dreaded "chromatic
aberration". A fuzzy image will quickly disappoint the observer and make
it seem "impossible" to really do anything meaningful in the hobby.
There are many poorly crafted telescopes out there that will give minimal
views of the moon, lesser views of the planets and only the largest of
galaxies and nebulae may be seen through them and usually unsatisfactorily.
This is generally due to the poor quality optics employed in these less
expensive telescopes. So, rather than end up discouraged, try to remember
that your initial investment in the hobby will most likely be your biggest
investment and purchase as much quality in an instrument as you can reasonably
afford.
TYPES OF TELESCOPES
----------------------------------
There are many types of telescopes from which to choose.
The reflector telescope is probably one of the simplest and most reliable
of designs for the amateur astronomer who is just getting started. Typically
this telescope is composed of just a simple tube with a mirror mounted
at the bottom of the tube which reflects the light back up the tube to
a diagonal mirror which in turn directs the light to the eyepiece mounted
on the side of the telescope. Reflectors are a good choice for combining
quality and apeture for a reasonable price.
The refractor telescope is of the "straight through" telescope design. That is, the observer looks through an eyepiece at the back of the telescope and sights right up through the telescope to a large objective lens at the primary opening of the telescope. This telescope is designed after the pirate's "spy-glass" telescope used for terrestrial observing but for astronomical viewing they are usually considerably larger. In fact, this is one of the limiting factors of a refractor; the physical size of the instrument becomes burdensome as the apeture grows in size. A typical refractor with a 3.5" objective lens opening can be 3-4 feet long! Imagine a refractor with an 8" lens! The University of Southwestern in Memphis used to have a 4-1/4" refractor. It was mounted on an old U.S. millitary recoil-less rifle mount and was over 10 feet long! So, sometimes, reflectors represent a more practical solution; particularly when larger apetures are required. However, a good refractor can provide some of the very best images to be had.
Another very effective telescope design is the Schmidt-Cassegrain or SCT. This telescope combines some aspects of both the refractor and the reflector. In the case of the Celestron telescopes, a correcting lens is found at the primary opening of the telescope (the end pointed toward the stars). Light passing through this lens is focused upon a mirror at the back of the telescope (very similar to the reflector telescope). The light is then reflected back toward the correcting lens at which point it contacts a mirror which sends the light back down the tube once again. When it reaches the large mirror at the back of the telescope it goes through a small hole in the mirror and is collected into the eyepiece at the back of the telescope. This type of telescope is very popular because its focal length (the distance from the correcting lens to the eyepiece) is actually optically longer than the telescope is physically (due to the multiple passes of the light back and forth through the tube). These types of telescopes are a bit more expensive than the less complicated reflector but the sealed system has some benefits in terms of protecting the imaging elements and influence of air currents in the telescope. They are also more managable for a given apeture size than the rather lengthy refractors or reflectors of equivalent apeture opening. Since the lense system is sealed, the SCT requires a longer cool-down period than a reflector telescope.
Regardless of your choice of telescope, try to stick with one of the quality brands (avoid the department store variety telescopes) and you should not be disappointed.
Keep in mind that you can make this hobby as complicated as you like or you can keep it very informal as well. You can spend considerable time in properly aligning your equatorial tripod such that it tracks the movement of the celestial objects perfectly and then just dial the objects in based upon their right ascension and declination coordinates or an onboard computer positioning system. Or, you can just go throw the tripod in the yard (not literally!) and start looking for objects based upon constellations. The first day I had my Celestron, I took it out, plopped it in the yard and showed my children, niece and nephew Jupiter, Saturn and the Orion Nebulae all within just a few moments. They were delighted!
Good luck in the hobby and I hope you find much enjoyment from your exploration of the night sky!
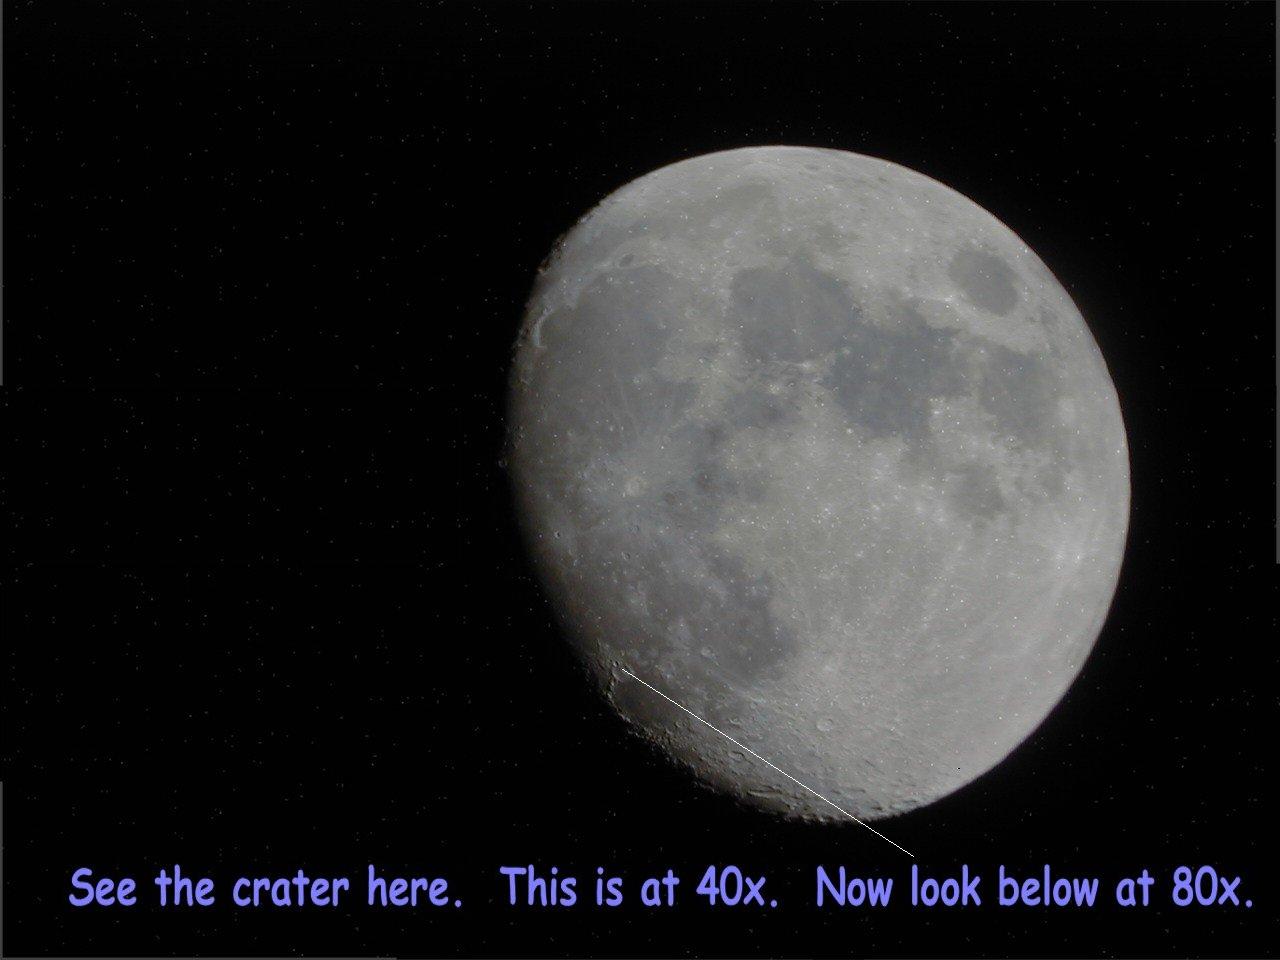
Just to give you an idea of some of
the fun I have been having with my new G5 (5" mirror) Celestron telescope,
here is a picture of the moon shot at 40x (magification power) on 3/16/00.
You'll have to pardon the image quality. I do not as yet have a telescope
mount for my camera, so believe it or not, I shot this picture by just
holding my digital camera up to the eyepiece of the telescope and snapping
away. This is referred to afocal photography - where you shoot pictures
through the eyepiece of the telescope. Once I have a proper mount
for my telescope, I should be able to produce pictures with improved focus.
Still, not bad for a hand held shot! (The stars aren't real - I added them).
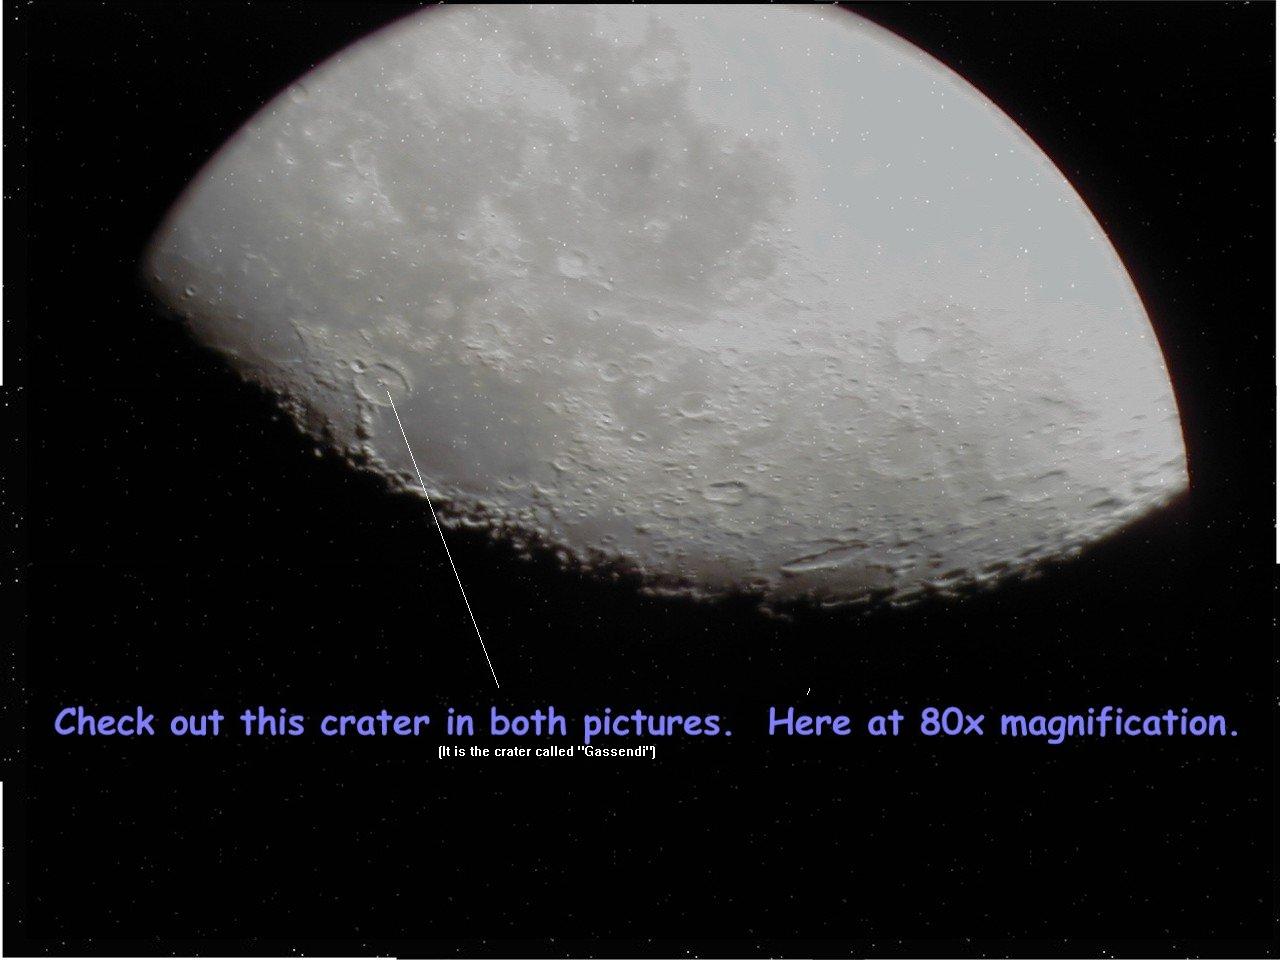
Now, for comparison, this following picture was
taken with a magnification of 80x. I achieved this by installing
my Barlow lens (a doubler) into the telescope. The Barlow effectively
doubles the power of my regular eyepiece from 40x to 80x. If you
look at the bottom of this photo and the photo above, you will see considerable
difference in the size of the crater (in the bottom right hand portion
of each picture) that has a mountain sticking up in the middle of it.
Again, please pardon the focus (especially in this one). I was hand-holding
the camera again!
As I am able to improve my photography with my telescope, I'll share additional pictures with you. I hope you have enjoyed these pictures and will stop back by periodically to see what else I'm up to. If you are enjoying astronomy too, write to me and let me know what aspects of it you enjoy and what objects you have seen that were of special interest to you.
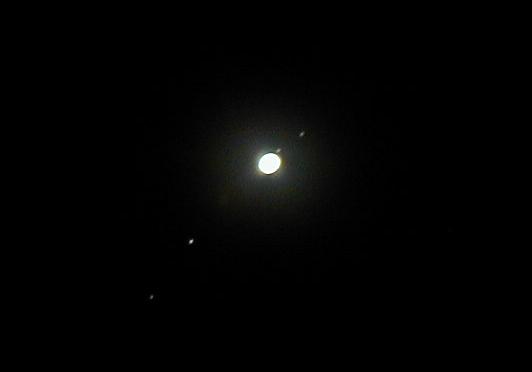
Update: 03NOV00
Here is a recent photograph of Jupiter. It's a terrible photo
but you can see at least 4 moons orbiting Jupiter in the photo. The
photo was taken on a night that had extensive cloud cover moving in, the
light fog from the city was bright, and my Olympus digital camera
was simply sitting on a tripod looking into the eyepiece of the G-5 telescope.
While far from ideal, it at least shows what you can do if you're willing
to work with what you've got. While there is no detail in Jupiter
here, the moons are quite interesting. Do you think you can tell
the orbital plane in which all the moons are residing ? (It's not too tough
it's a straight line drawn through the moons.).
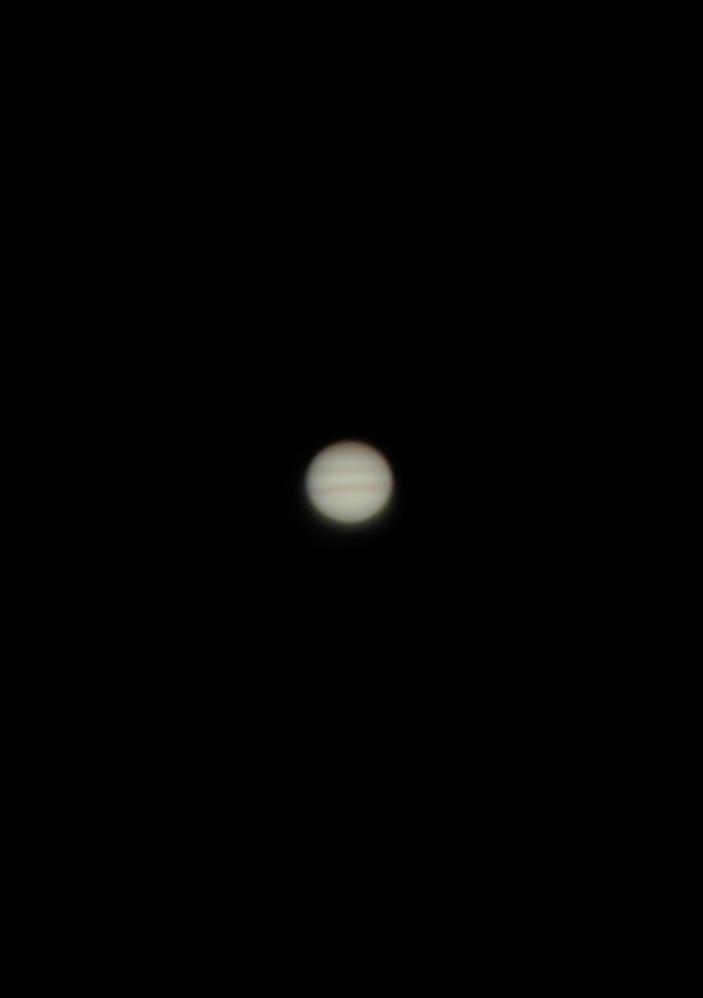
Here's a recent photo (20JAN01) of Jupiter. If you look closely you can see a couple of bands crossing the face of the planet.
Jupiter - 20JAN01
Celestron G5 (5" SCT)
Casio D460 Digital Camera
Mag: 80x
25 mm eyepiece w/Barlow 2x
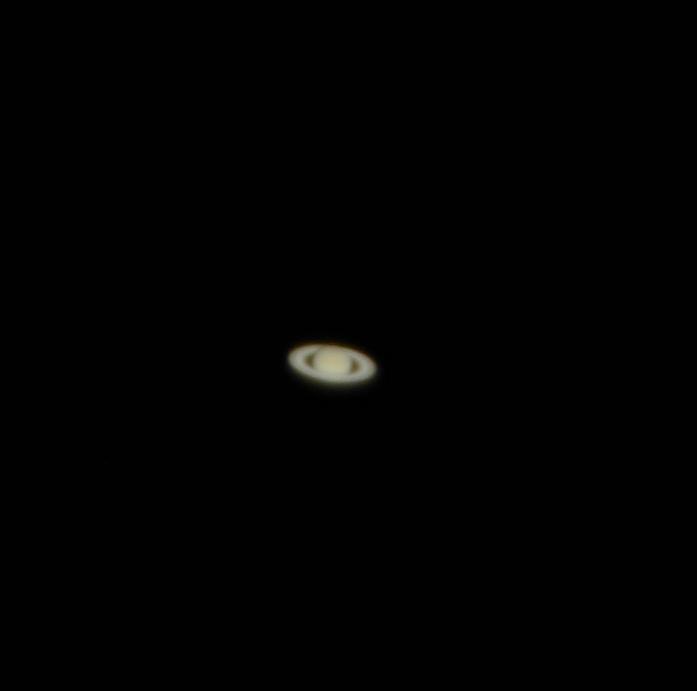
Here's a photo of Saturn taken on the same night (20JAN01).
Saturn - 20JAN01
Celestron G5 (5" SCT)
Casio D460 Digital Camera
Mag: 80x
25 mm eyepiece w/Barlow 2x
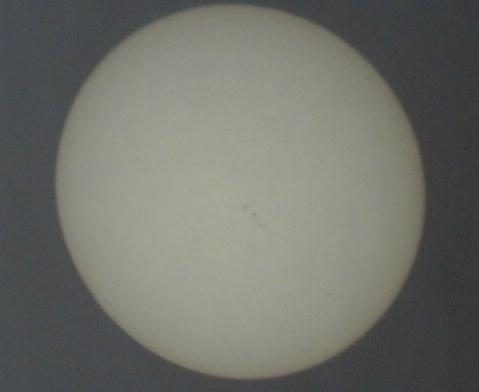
Below is a recent picture of the sun taken on 27Jan01. Note there are some very small sun-spots showing in the picture. They are visible as dark spots near the center of the sun. There is also one in the upper left corner and one in the bottom right corner of the picture.
Last - a recent moon photo. It was nearly a full moon so there wasn't a lot of detail to be had on the face of the moon but there are some nice craters near the edges.

I'll keep refining my photographic techniques, pick better viewing nights
and locations and keep posting the results for you to view. I hope
you enjoy it.
![]()